- Farm & Garden
- Pumps & Motors
- Food Processing
- Workshop, DIY & MRO
- Lab & Measuring Tools


Brand: Generic ( Made in India )
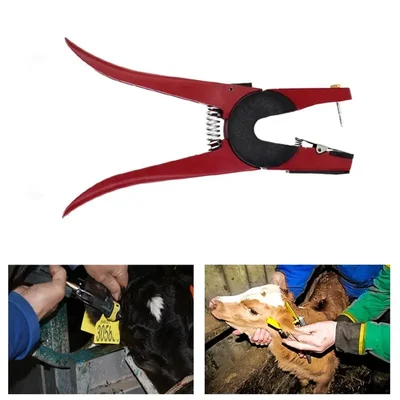
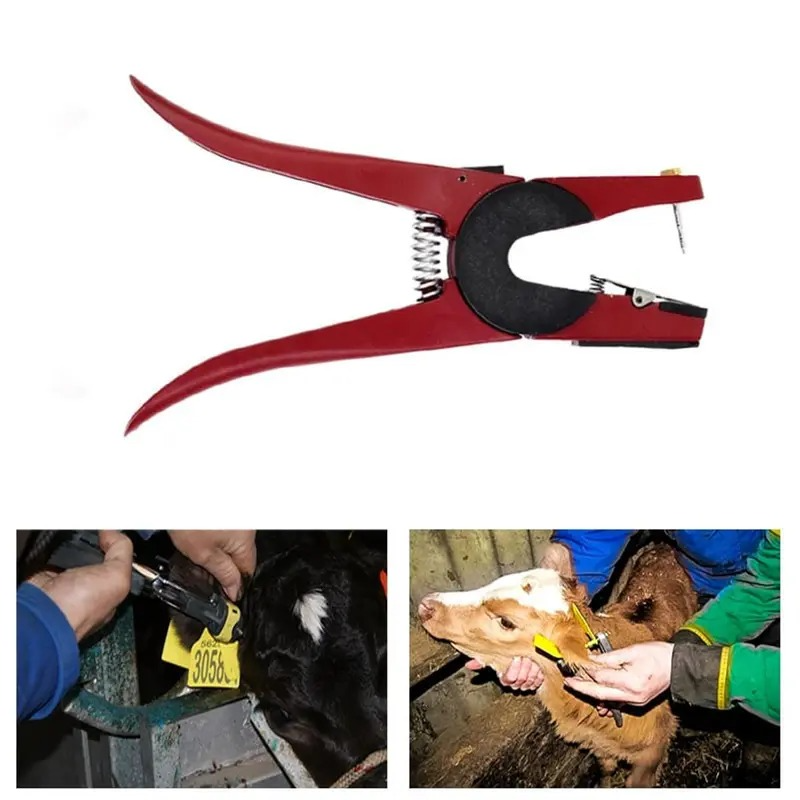
Animal Ear Tag Applicator for Cows Goats Sheep
SKU: RD-KD-20222598
 6 people have bought this recently
  Estimated Delivery By: Jun 8 - Jun 10


MRP : ₹899 ₹679
24% OFF!
6 people have bought this recently Estimated Delivery By: Jun 8 - Jun 10 Easy Return
& Refund
& Refund
Quality
Assurance
Assurance
Trusted
Delivery
Delivery
After Sales
Assistance
Assistance
Buyer
Protection
Protection
₹679 (Including GST)
MRP : ₹899
24% OFF!
Get Extra ₹10 OFF on Prepaid Orders
QTY :
-
1
+
Short Description
Animal Ear Tag Applicator
Punch Type
Comfortable Grip
Country of origin: India
Specifications
- Brand: Generic ( Made in India )
- Weight (Approx.) : 340 gm
- Size : 10 inch (25.4 cm)
- Type : Punch
- Body Material : Aluminum,
- Weight : 340 grams (Approx.)
Description
The animal ear tag applicator is a tool designed to facilitate the efficient tagging of animals for identification purposes. This durable device ensures that the process of applying identification tags to livestock is both swift and humane, minimizing stress for both the animal and the handler.
Features
:- Simple and Convenient Design : The animal ear tag applicator is designed to be lightweight and features an easy-squeeze mechanism. This design allows for minimal force required during application, making it user-friendly for handlers.
- Ergonomic and Comfortable Use : The applicator is ergonomically friendly, which means it can be comfortably used by almost any adult without causing hand fatigue. This is especially important in livestock operations where tagging can be a repetitive task.
- Quick and Quiet Operation : The innovative design allows for fast application of ear tags while minimizing noise during the process. This contributes to maximum comfort for the animals being tagged.
Applications
:- Identification of Livestock: Ear tag applicators are primarily used to attach identification tags to animals, which can include visual identification tags (VID) and electronic identification tags (EID). These tags help farmers and ranchers keep track of individual animals within a herd, allowing for better management practices.
- Record Keeping: The use of ear tags simplifies record-keeping processes in livestock operations. By tagging animals with unique identifiers, producers can easily maintain accurate records regarding feeding schedules, veterinary treatments, breeding cycles, and other important management data.
- Research Purposes: Researchers utilize ear tag applicators when conducting studies on animal behavior, genetics, or population dynamics. Tags allow researchers to identify individual animals over time without causing significant stress or harm during the tagging process.
Usage
:Step 1: Prepare the Applicator Before you begin, check the applicator for any damage. Ensure that the pin and clamp are not bent or broken and that they are properly aligned. This alignment is crucial for the interlocking of the tag pieces. You can check this by clamping them together; the pin should slide easily into the clamp.
Step 2: Prepare the Tag Select the appropriate ear tag for your animal. The tag should have a stud (which will be inserted into the ear) and a button (which will be on the outside of the ear). Write any necessary identification information on the button side of the tag using a designated tagging marker to ensure it remains legible over time.
Step 3: Positioning Once you have prepared both the applicator and tag, position yourself correctly next to the animal. It is essential to catch and restrain the animal properly to limit head movement during tagging. This can be done using a calf cage for younger animals or a head gate for older cattle.
Step 4: Clean the Tagging Site Before applying the tag, clean the area of the ear where you plan to place it. This helps reduce any risk of infection from debris or bacteria present in that area.
Step 5: Place Applicator Over Tagging Site Hold the applicator with one hand and position it over the chosen tagging site on the animal’s ear. The stud should face towards the back of the ear, while the button should face towards you at the front.
Step 6: Apply Pressure With everything positioned correctly, squeeze the trigger of the applicator quickly and firmly. You should hear a click as the stud and button interlock together within the ear.
Step 7: Inspect Placement After applying, remove your hand from around the applicator and inspect that both parts of the tag are securely interlocked in place within the ear.
Step 8: Maintain Your Applicator After use, especially if shared among multiple animals, clean your applicator thoroughly with alcohol or another disinfectant to prevent spreading any potential infections between animals.
Questions & Answers (0)


Select attribute